Inner Gripping - Multi-Assist
|
This document describes how to set up the software for inner gripping. |
1. Use following tools
|
|
2. Procedure
2.1. Inner jaws are required
Workpieces can only be gripped internally with jaws that are configured for inner gripping.Before starting, make sure that you have inner jaws available.
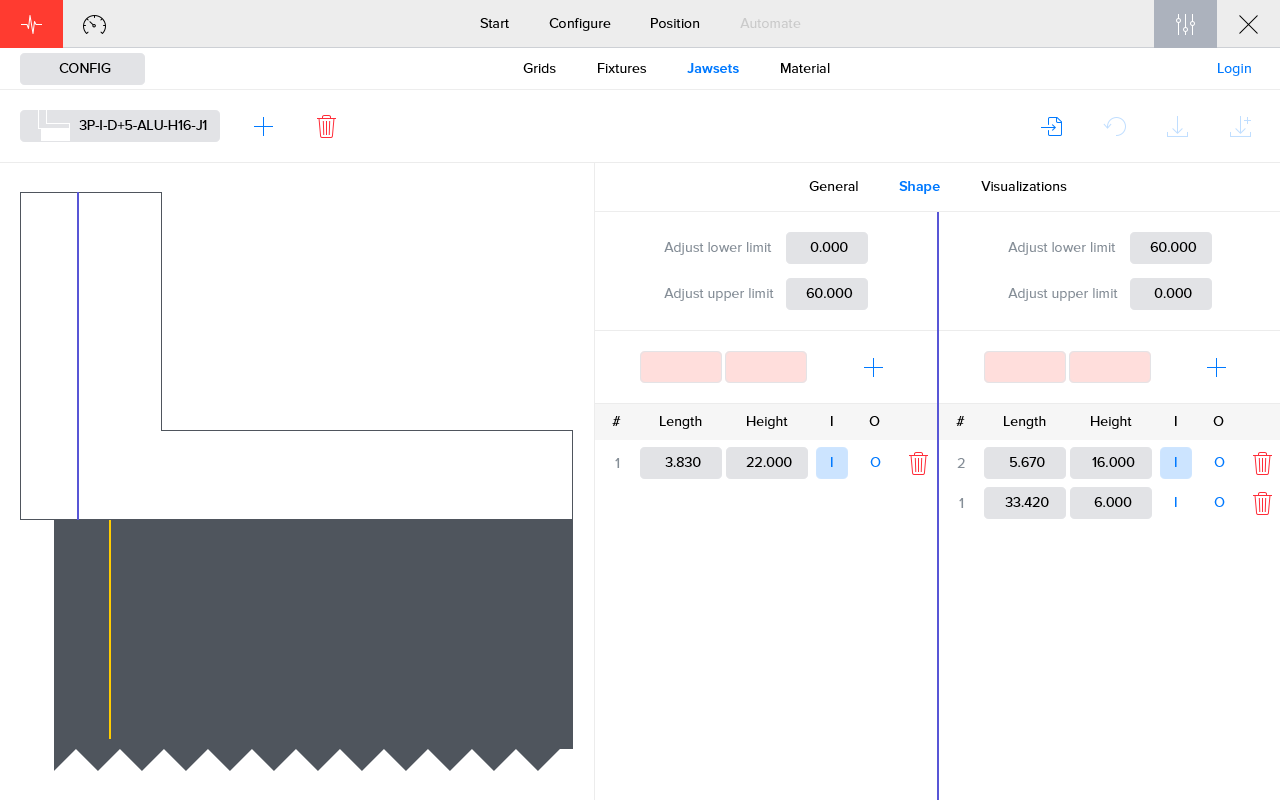
Go to settings, select CONFIG and go to Jawsets.In this screen new jaws can be defined or existing jaws can be changed.Refer to the user manual for more information about how jaws are configured.
Select a jaw from the drop down menu on the top left.In the tab 'Shape' the shape of the jaw is defined.The shape of the jaws defines how the jaw can be used.Next to the measurements is indicated whether the surface can be used for inner or outer gripping.This is indicated by 'I' for inner and 'O' for outer.
|
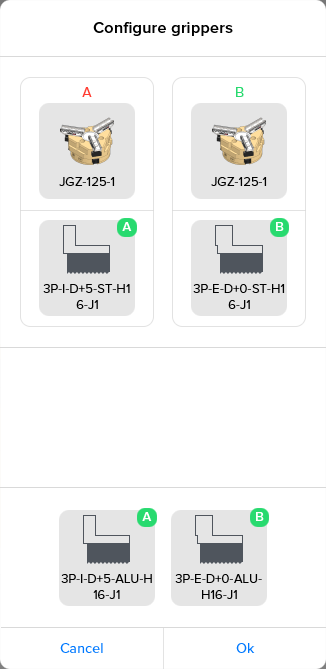
The name of the jaw often indicates whether the jaw is for external or internal gripping.For example '3P-E-D+0-ST-H16-J1' is for external gripping and '3P-I-D+5-ST-H16-J1' is for internal gripping. |
2.2. Workpiece definition with inner layer
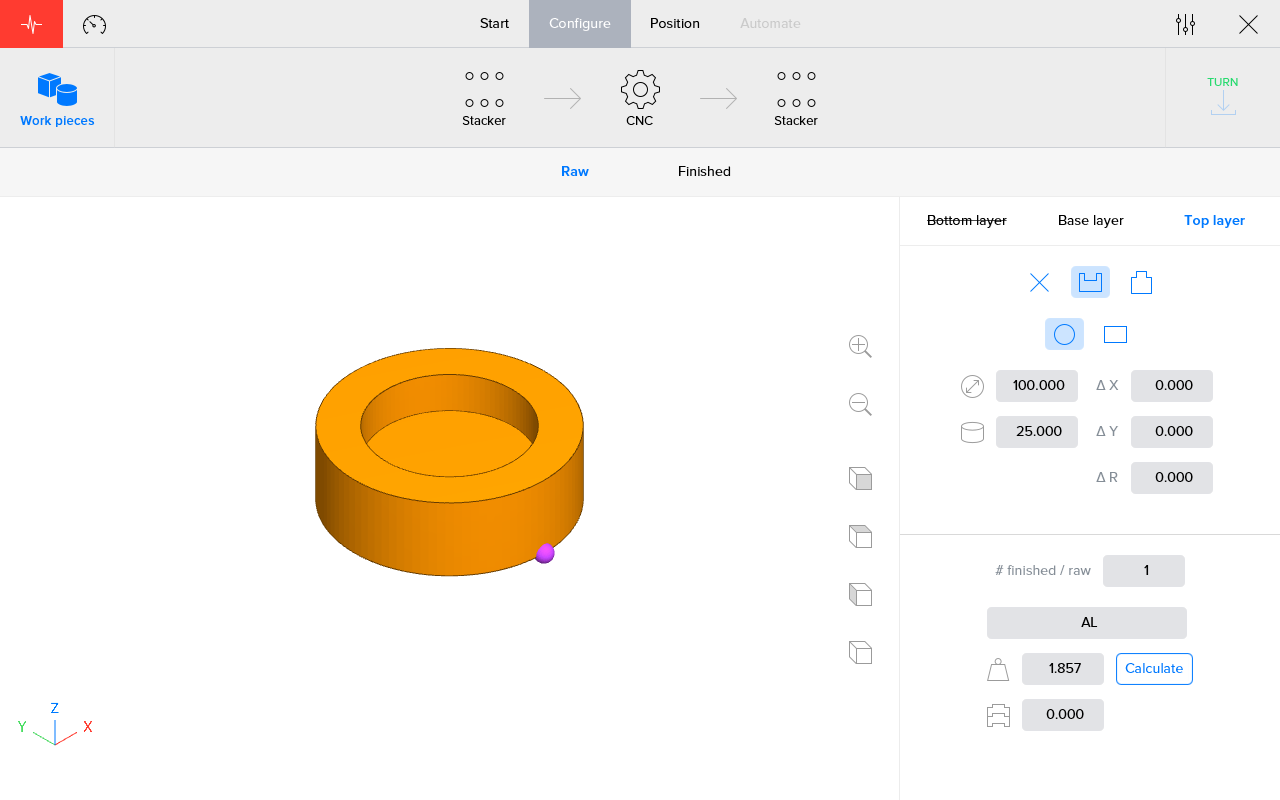
Make sure to define a top or bottom layer with a cut-out so inner gripping is possible.The cut-out should be large and deep enough for the jaws to fit.
2.3. Select the inner layer for positioning
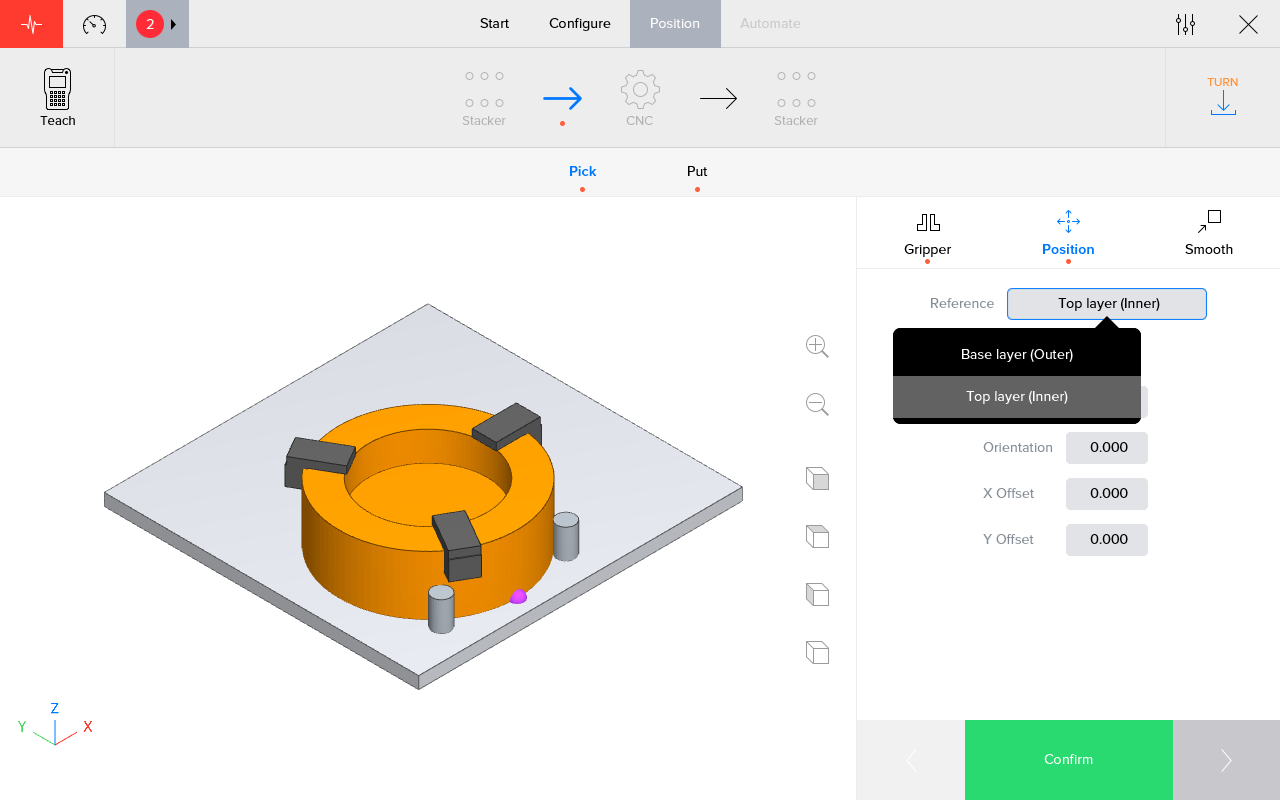
During positioning, go to the step where the workpiece has to be picked internally.In the tab 'Position' change the reference to the layer with the cut-out.The reference layer will define how the positioning should be done.It defines whether the workpiece is gripped externally or internally.
It is possible that the visualisation is strange.The jaws on the gripper still need be changed to the jaws that support inner gripping.
2.4. Select inner jaws
Go the the tab 'Gripper' and press the button 'Configure' to configure the jaws on the gripper.
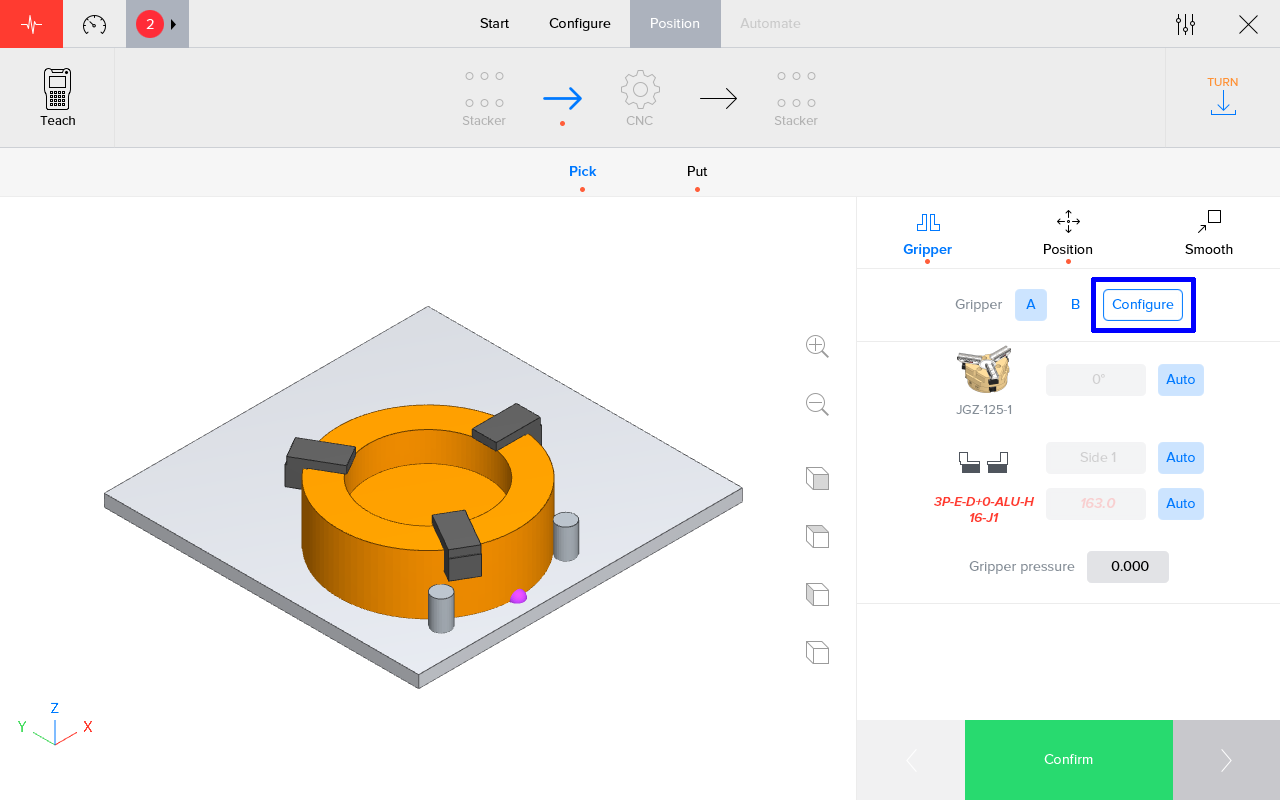
Change the jaws to suitable inner gripping jaws.The software indicates in green witch jaws are suitable for witch gripper.Drag and drop de jaws you want to use.
2.5. Automate
Check and confirm the positions.Start the process.The workpieces should be gripped internally as configured.
3. How to get further help
Do not hesitate to contact us when you need additional support beyond the documents provided in the RoboJob Service Knowledge Base.
You may contact the RoboJob Service department using following means:
-
Help Center: service.robojob.eu
-
Email: service@robojob.eu
-
Phone: +32 15 70 89 70
We kindly ask you to provide us the following information:
-
Serial number xx-xx-xxx
-
Description of the fault or defective part
-
Exact error code or message
-
What did the robot do
-
What was the robot supposed to do
-
Pictures or videos
You can send this information to us via email.To send large files you may make use of a file transfer service like WeTransfer: robojob.wetransfer.com.
An automatic confirmation will be sent upon receipt of your mail.
