Compensate table position - Multi-Assist
|
The robot is misaligned and has a position error when picking the workpieces from the table.This document describes how to compensate the position error.Note that this is a temporary solution and that an intervention by a RoboJob technician is required to re-measure the table user frame. |
1. Use following tools
|
|

2. Procedure
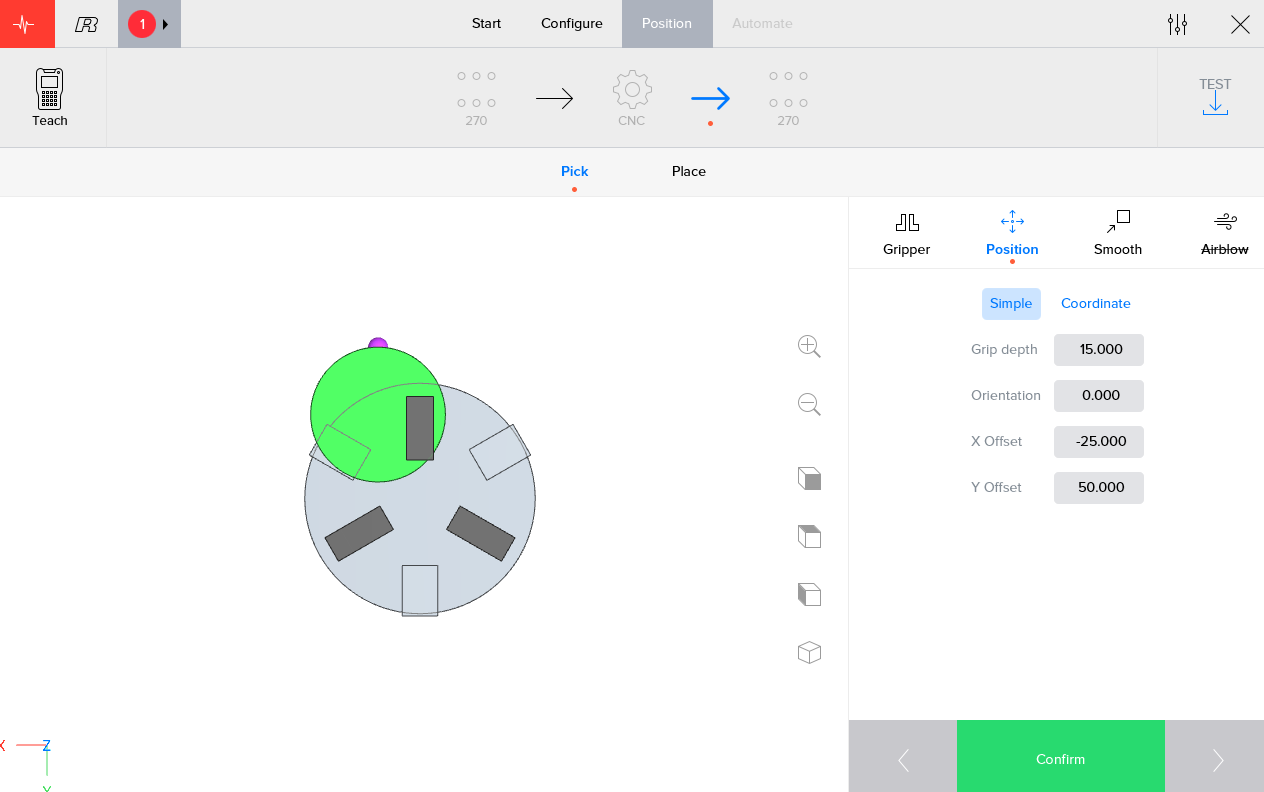
2.1. Set the required offsets to pick a piece of the table
Start an automated cycle and stop the robot while it is picking up a piece from the table.You can use the Hold button next to the IPC screen for this.The closer the robot jaws are to the piece, the more accurate the measurement of the required offsets can be.
|
Be carefull to move the robot at reduced speed when it is approaching the workpiece.This way you’ll have enough time to react and stop the robot when a collision with the workpiece threatens to occur. |
Measure the required offsets with a tape measure and fill them in at the X Offset and Y Offset off the IPC.The Jaws in the visualisation will move away from the workpiece.The workpiece in the visualisation will stay put at it’s 'ideal - theoretical' position.
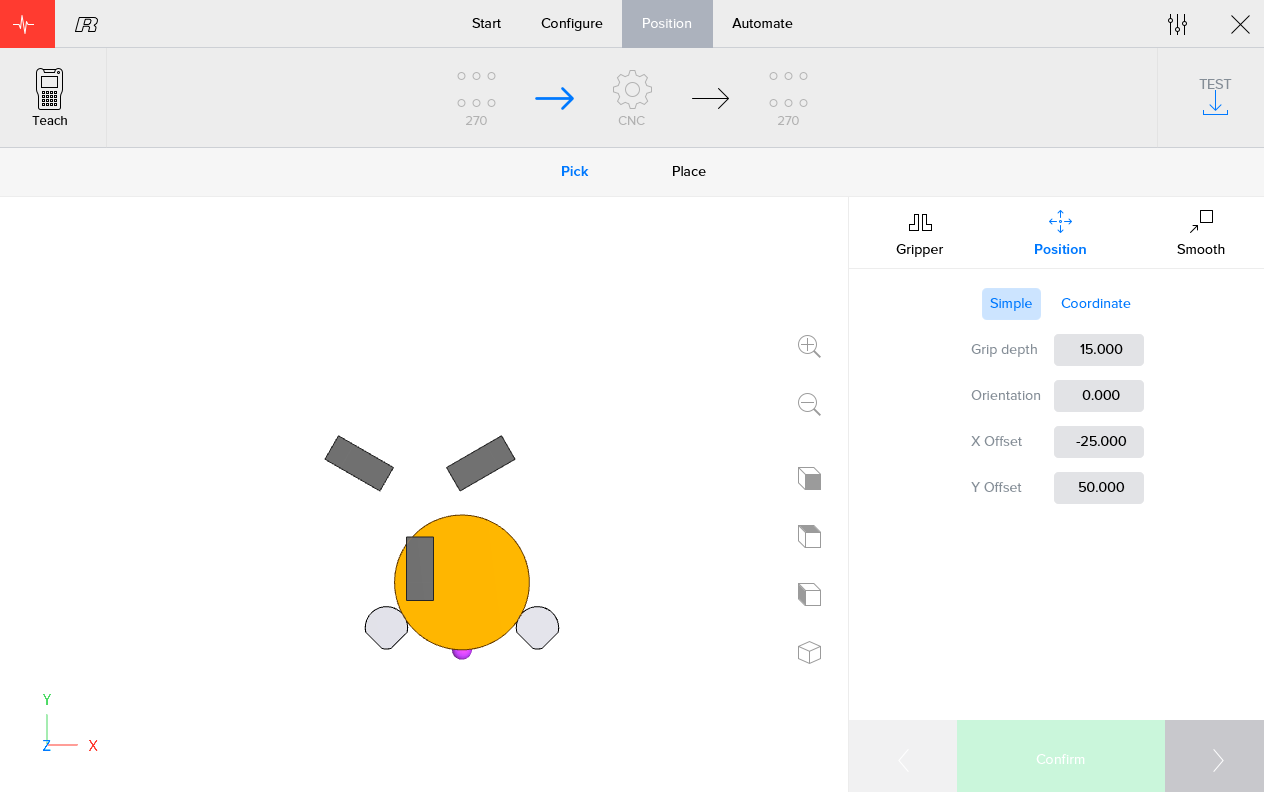
Abort the automation and run it again to check if the measured offsets are correct.It might be neccesary to perform these steps a few times to fine-tune the offsets.
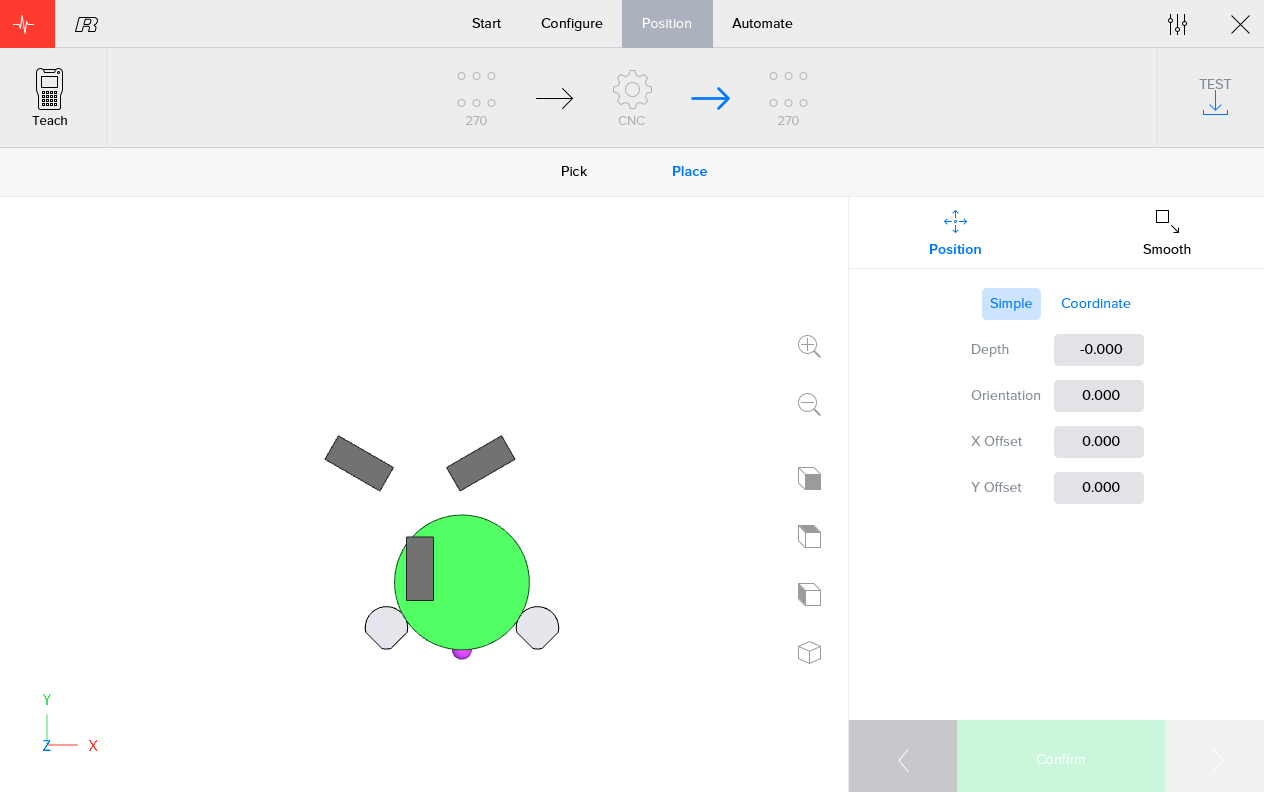
2.2. Set the required offsets to place the piece in the chuck
Because we set some Offsets in the previous step, the robot thinks it has picked up the workpiece out of center.It will compensate for this while placing the piece in the chuck.Therefore the robot grippers will be out of the center of the chuck as can be seen in the following visualisation.
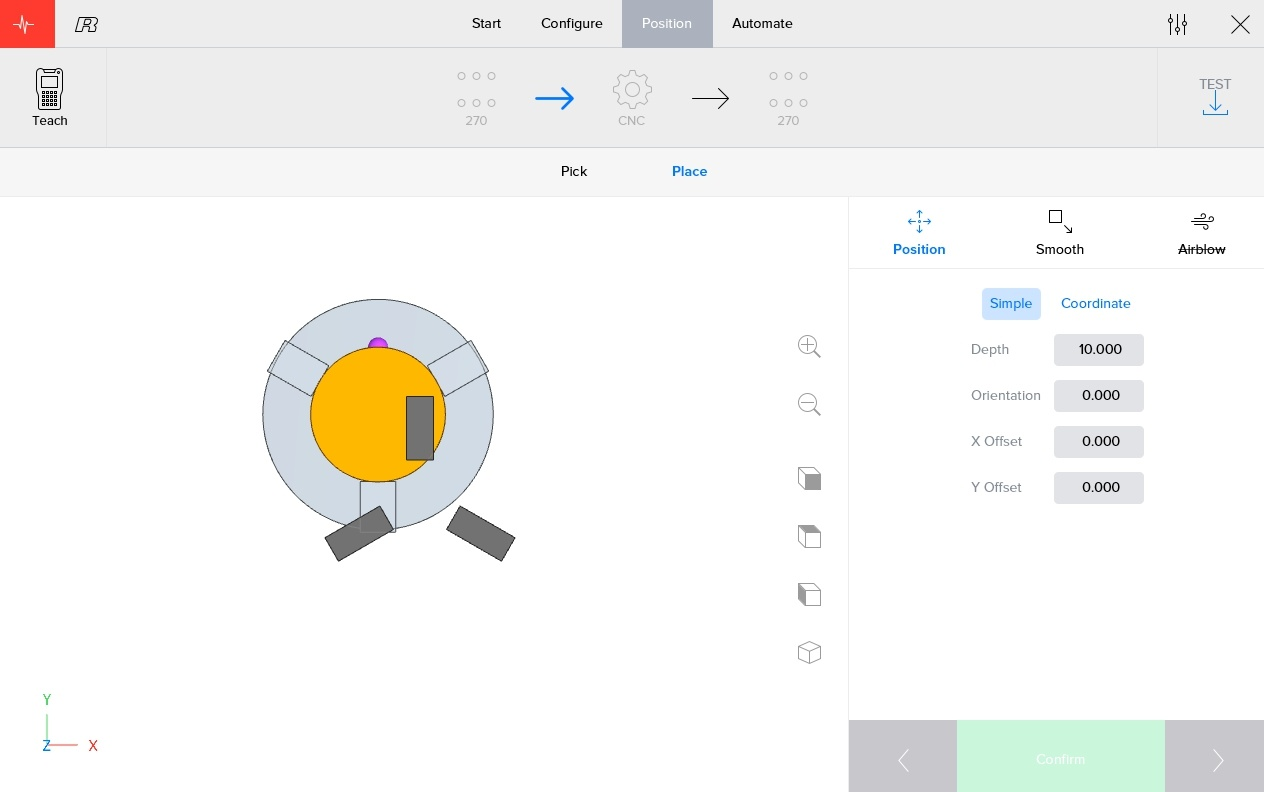
In reality, the workpiece is of course located in the center off the robot grippers.Therefore we must fill in some offsets again to make sure the grippers will put the workpiece in the center of the chuck.The values you fill in for X Offset and Y Offset should be the same as those which you filled in in the previous step.The robot grippers in the visualisation will move towards the center off the chuck.The virtual workpiece in the visualization will keep it’s relative position to the robot grippers and will now be outside of the center off the chuck.This isn’t a problem as we know that, in reality, the workpiece is located in the center of the robot grippers.
When the User Frame off the chuck isn’t correct and you notice that the workpiece isn’t perfectly centered in the chuck, this can also be compensated by further altering the Offsets in this step.
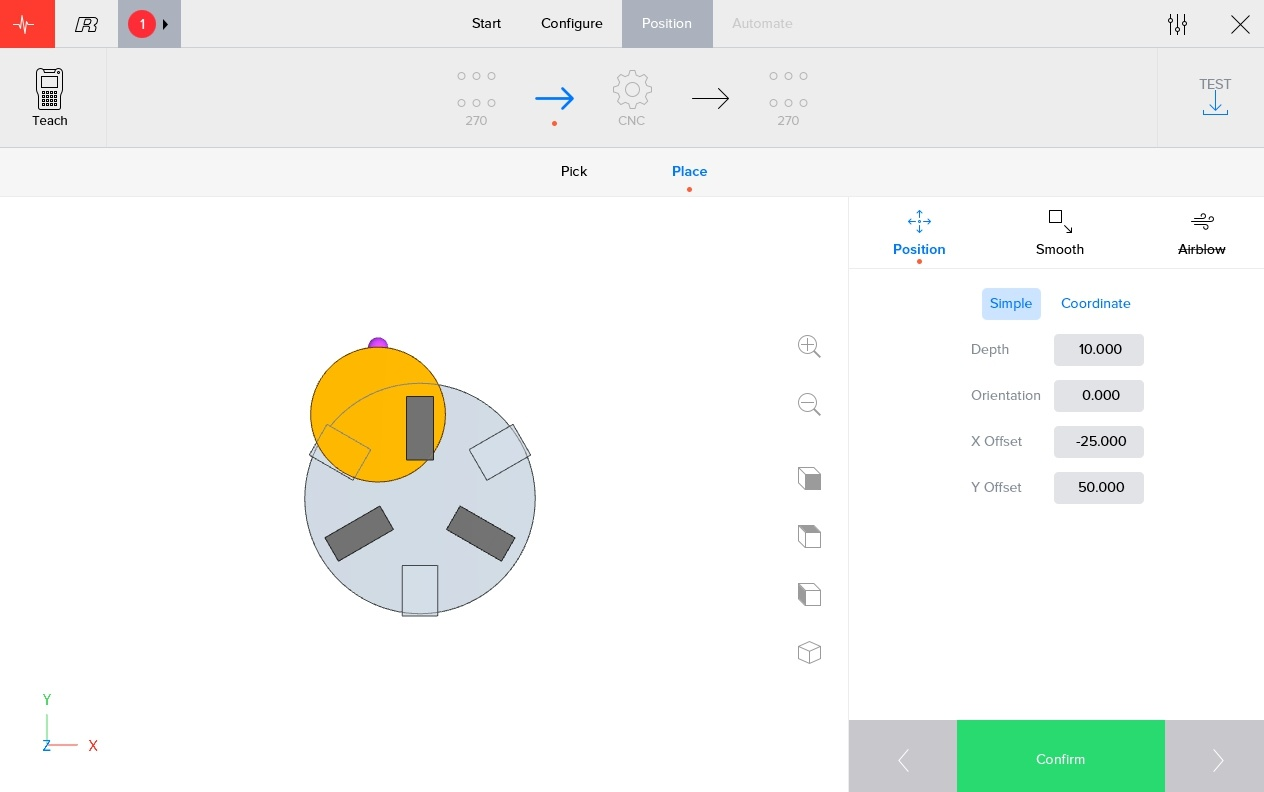
2.3. Set the required offsets to pick the piece from the chuck
Because we set some Offsets in the previous step, the robot thinks it placed the workpiece out of center in the chuck.It will compensate this while picking the piece from the chuck.Therefore the robot grippers will be out of the center of the chuck as can be seen in the following visualisation.
|
When your RoboJob system has the option 'Position finished part' enabled or your finished part is passed on from the main to the sub spindel, the position of the workpiece in the chuck is 'reset'.It shall therefore appear in the center of the chuck, as it is in reality, and can be picked up without using any offsets (except those necessary to compensate a bad user frame at the chuck of course). |
In reality, the workpiece is located in the center of the chuck.To compensate this, we have to, again, apply some offsets to make sure the robot grippers grip the workpiece in the center of the chuck.The values that need to be entered should be the same as these in the previous step.You’ll notice that the robot jaws move to the center of the chuck where the real workpiece is located.The virtual workpiece in the visualisation will keep it’s position in relation to the chuck.
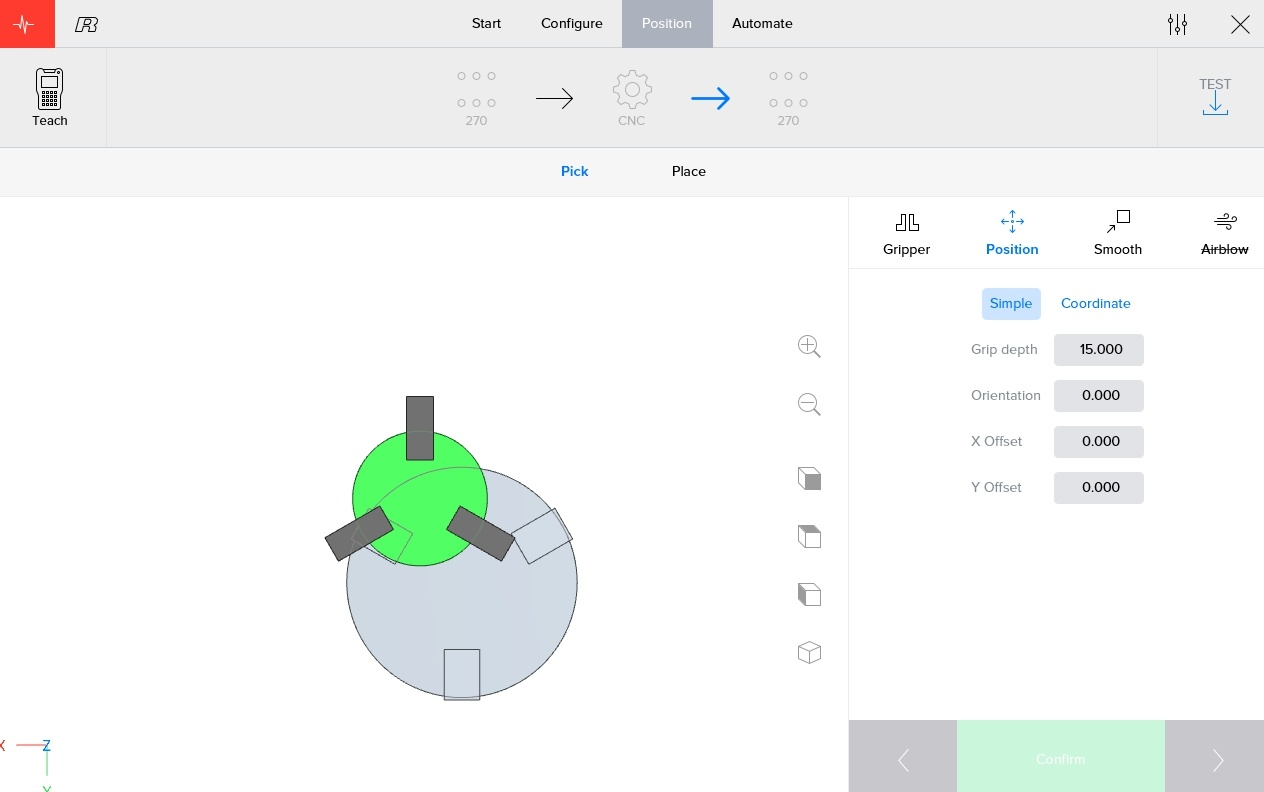
2.4. Set the required offsets to place the workpiece on the table
Because we set some Offsets in the previous step, the robot thinks it picked up the workpiece out of center.It will compensate this while placing the piece on the table.Therefore the robot grippers will not be centrally aligned in regards to the center of the two poles as can be seen in the following visualisation.This misalignment is, in this case, equal to the offset we gave in first step.Because we place the piece on the same table, and thus same wrong userframe, as in the first step, this misalignment is exactly what we need to place the piece in the right spot in reality.
2.5. General Approach
When the workpiece is placed back on a different position than in the first step, for example a pallet, things become quite a bit more complicated.At that point it is probably easier to just use trial and error to determine the correct offsets.The absolute numeric values of the required offsets should most of the time be around the values found in step 1, plus or minus additional offsets which are required when the other userframes also have a slight misalignment.
2.6. Alternative Method
It is also possible to manually guide the robot to the pick or place positions using the teach pendant.This 'Teaching' procedure is described in the manual.
3. How to get further help
Do not hesitate to contact us when you need additional support beyond the documents provided in the RoboJob Service Knowledge Base.
You may contact the RoboJob Service department using following means:
-
Help Center: service.robojob.eu
-
Email: service@robojob.eu
-
Phone: +32 15 70 89 70
We kindly ask you to provide us the following information:
-
Serial number xx-xx-xxx
-
Description of the fault or defective part
-
Exact error code or message
-
What did the robot do
-
What was the robot supposed to do
-
Pictures or videos
You can send this information to us via email.To send large files you may make use of a file transfer service like WeTransfer: robojob.wetransfer.com.
An automatic confirmation will be sent upon receipt of your mail.