Check/Change time and date on the robot
|
This document describes how to view and change the time and date on your robot.It is important to set the time correctly because it is used to set timestamps in backups of the communication between the IPC and the robot.The robot is not connected to the internet and can therefore not use the internet to correct the time on its own.It is recommended to periodically check if the time is still correct. |
1. Use following tools
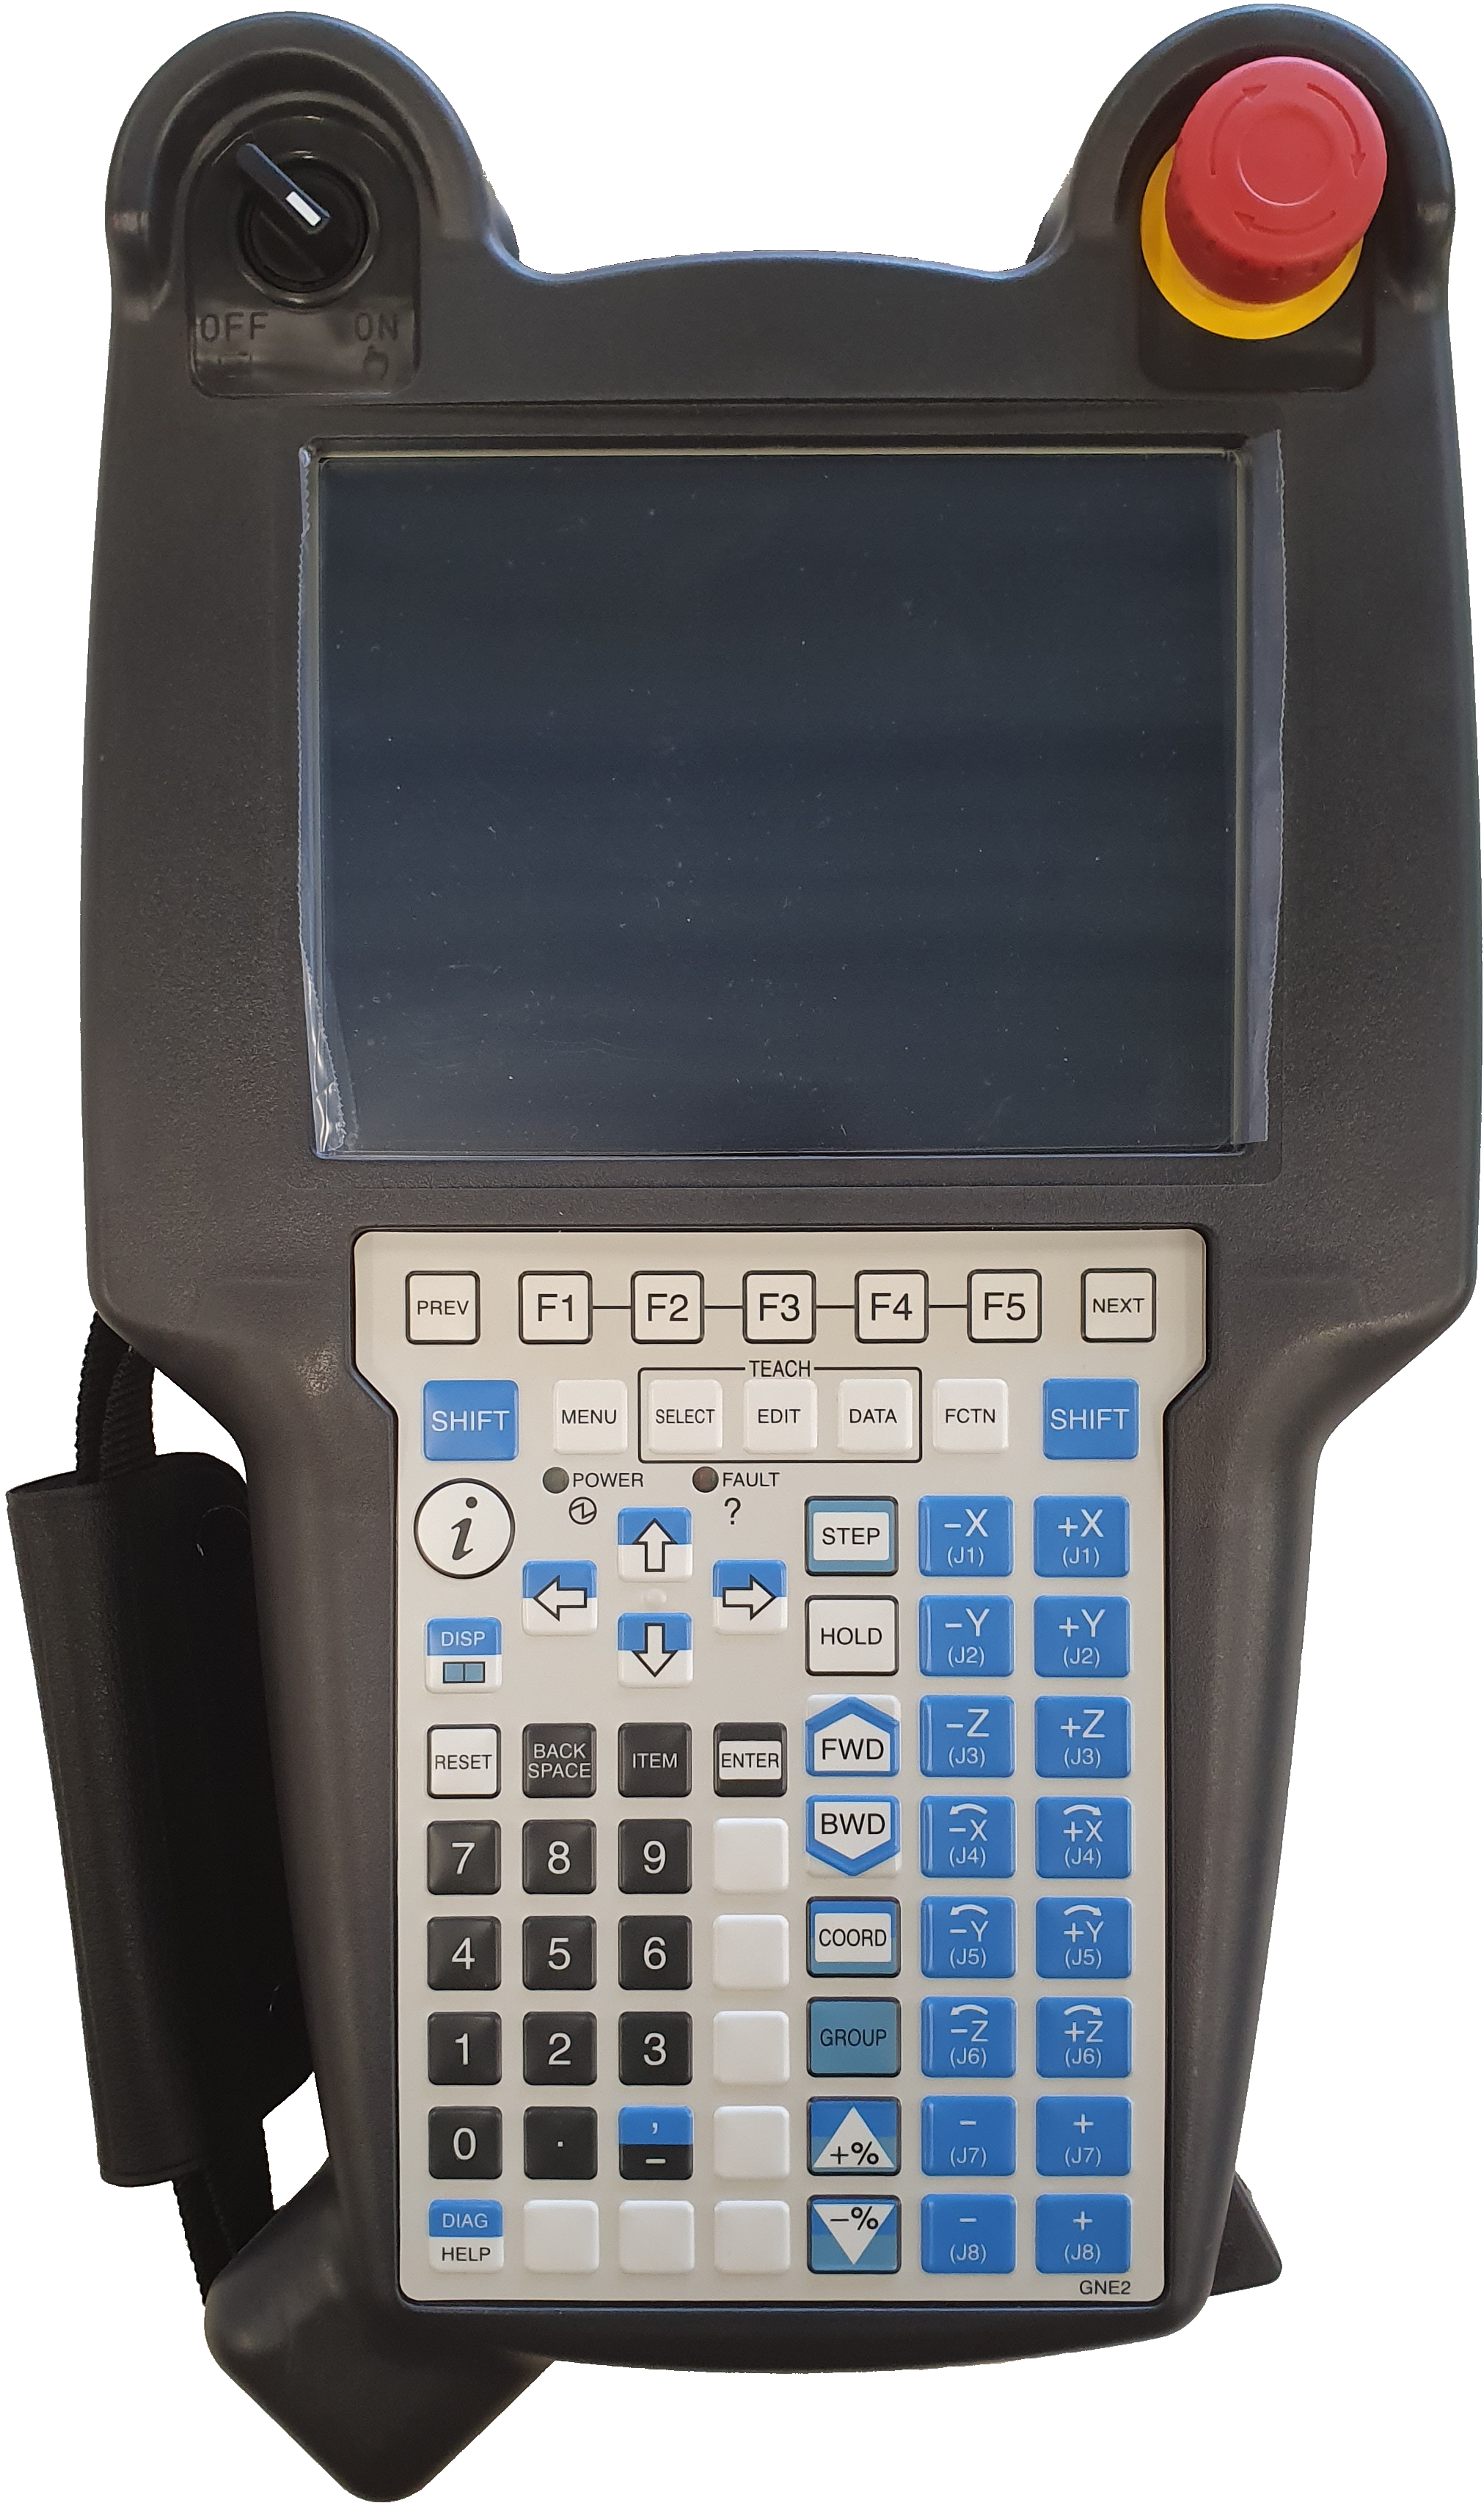
|
|
2. Procedure
2.1. Navigating the menu
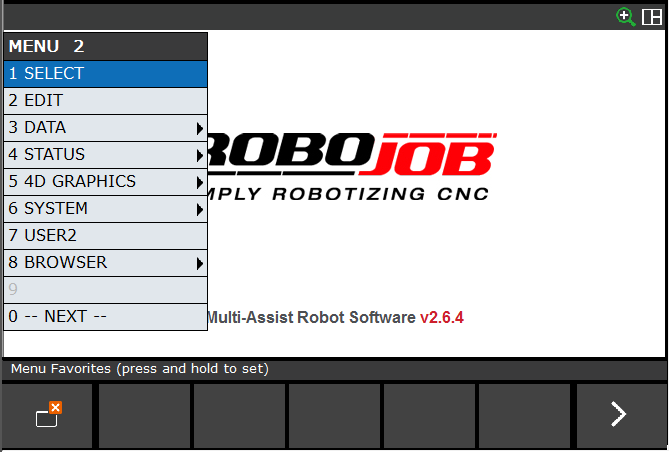
When the robot is powered on the screen should look like the image below
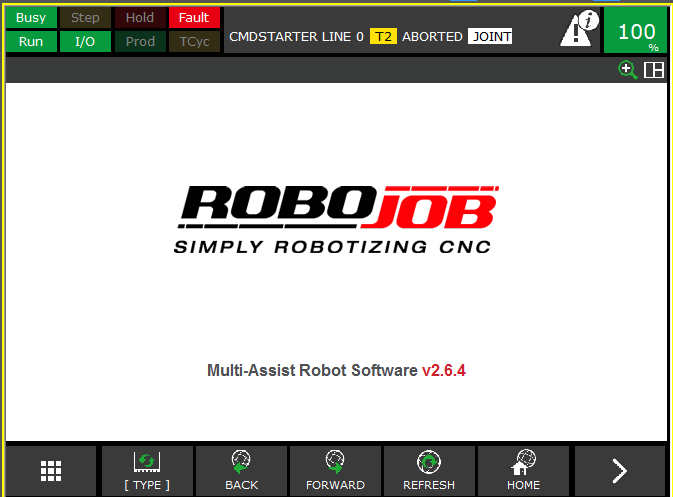
To enter the menu, press the button labeled “MENU” on the button panel. The menu should now be open on your screen.
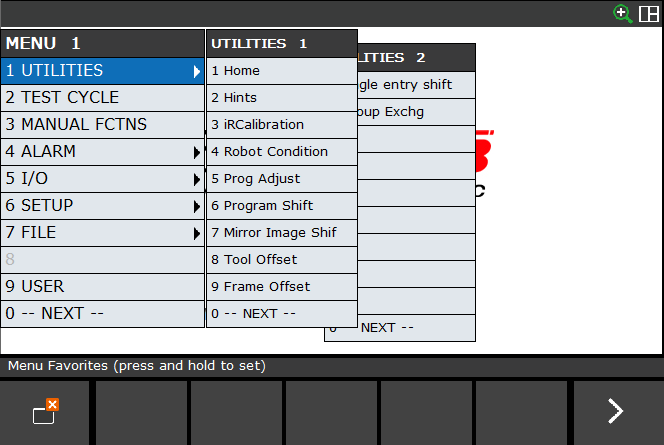
You can navigate the menu by using the arrow keys on the button panel or you can use the numbers labeled next to the options.
If you use the arrow keys the currently selected option is highlighted in blue. For example, in the photo left is the utilities option highlighted.
2.2. Viewing the time/date of the system
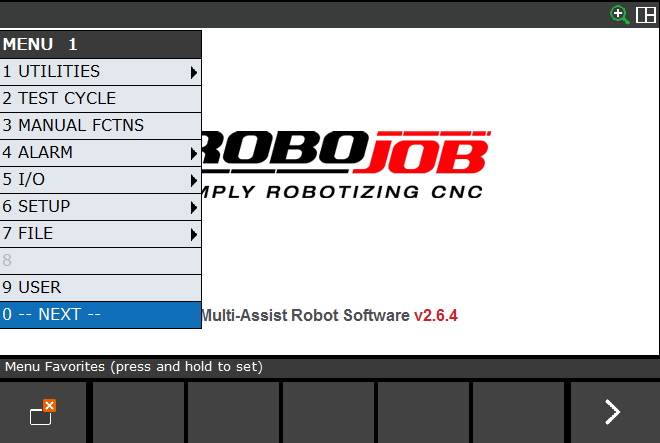
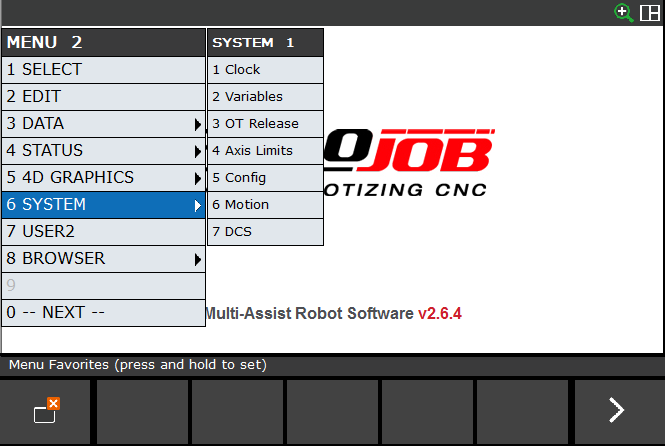
Navigate to the option labeled “NEXT”.If you use the arrow keys, you need to press the “ENTER” key to select the option.
Now the robot gives us more options to choose from.We now want to navigate to the option “SYSTEM”.
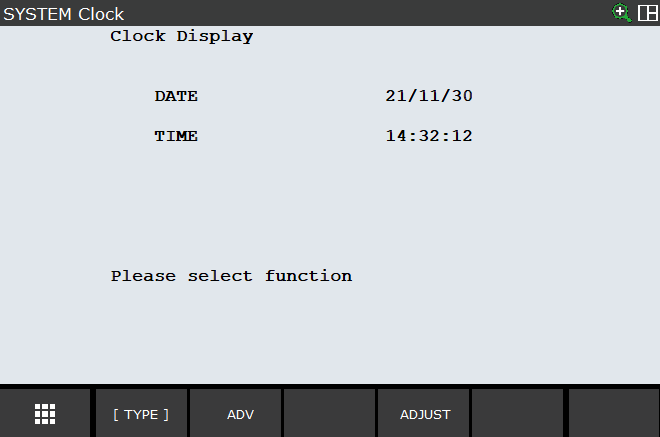
When entering the “SYSTEM” tab you should see the time and date of the system.
2.3. Changing the time and date
To change the time on the system, press the “F4” key.It is also labeled on your screen with “ADJUST”.
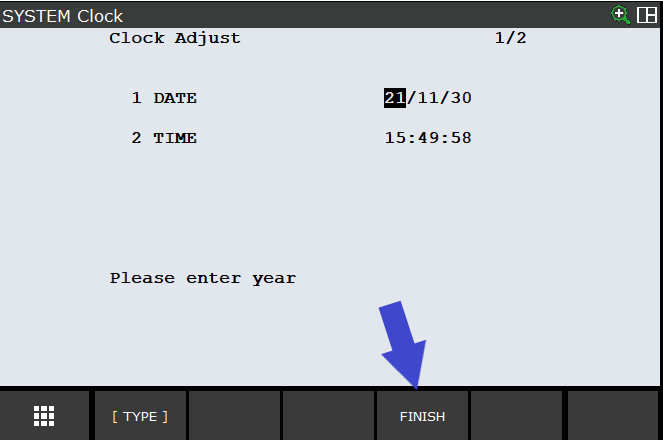
This will highlight the first number of the date.This is always set in the format “year/month/day”.The time format is “hours/minutes/seconds”.You can navigate the menu by using the arrow keys.
Also notice how the time has stopped counting. This is just visual. The system is still counting in the background. When you leave this menu, the time that the system has will reappear. So, if you have to adjust the time, enter the time that it was right before entering the “adjust” menu. If you don’t know this time press “F4” again and you will exit the adjust menu.

When you have selected the number you want to change, just start typing the number you want it to be.After entering the desired number, press “ENTER” to confirm.
If the number you want is for example “05” you can also just press 5 and then “ENTER”.
In the example below we change the day from 30 to 15.
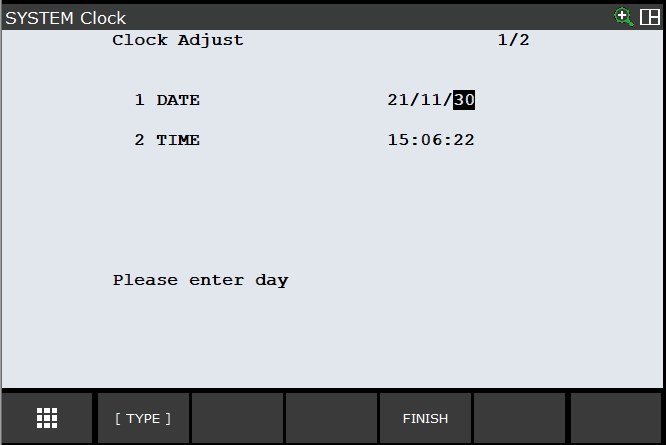
Select the day with the arrow keys.
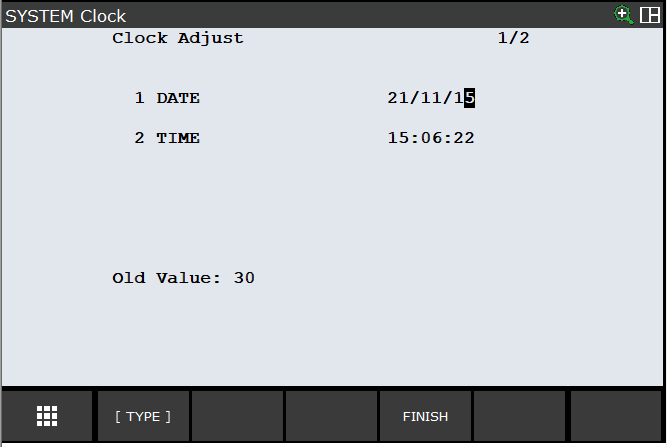
Type 15 using the number keys.
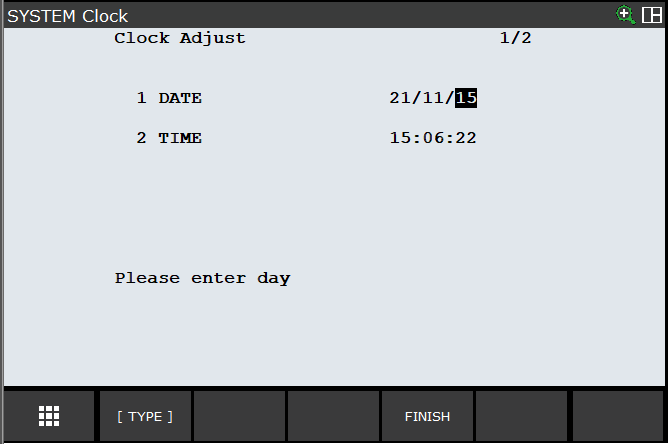
Press the “enter” key to confirm.
When you are done ajusting time and date press the “F4” key or “FINISH” to exit back to the view page.
3. How to get further help
Do not hesitate to contact us when you need additional support beyond the documents provided in the RoboJob Service Knowledge Base.
You may contact the RoboJob Service department using following means:
-
Help Center: service.robojob.eu
-
Email: service@robojob.eu
-
Phone: +32 15 70 89 70
We kindly ask you to provide us the following information:
-
Serial number xx-xx-xxx
-
Description of the fault or defective part
-
Exact error code or message
-
What did the robot do
-
What was the robot supposed to do
-
Pictures or videos
You can send this information to us via email.To send large files you may make use of a file transfer service like WeTransfer: robojob.wetransfer.com.
An automatic confirmation will be sent upon receipt of your mail.