Change A1_SETTINGS on the robot
|
This document describes how to change the A1_settings on the robot controller. |
1. Use following tools
|
|
2. Procedure
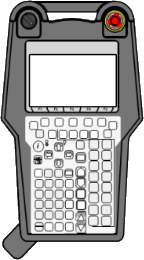
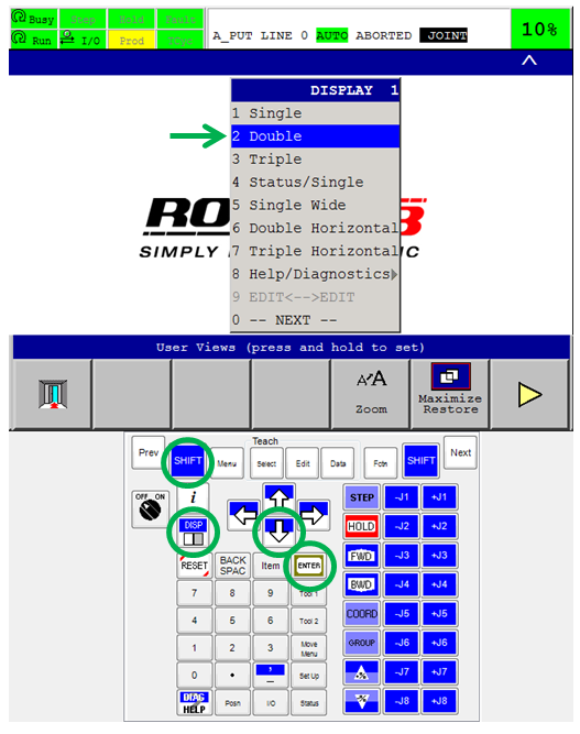
Take the teach pendant of the robot. Press SHIFT+DISP, select 2 Double and press ENTER to split the screen in two.
| |
|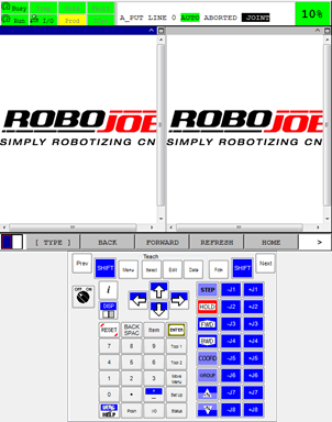
Switch to the second screen by pressing DISP(don’t use shift this time). The title bar of the screen on the right becomes blue. All the next steps have to be performed in the screen on the right.
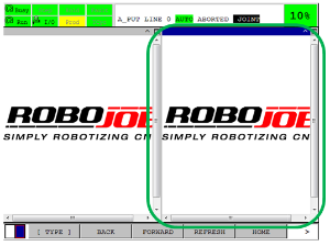
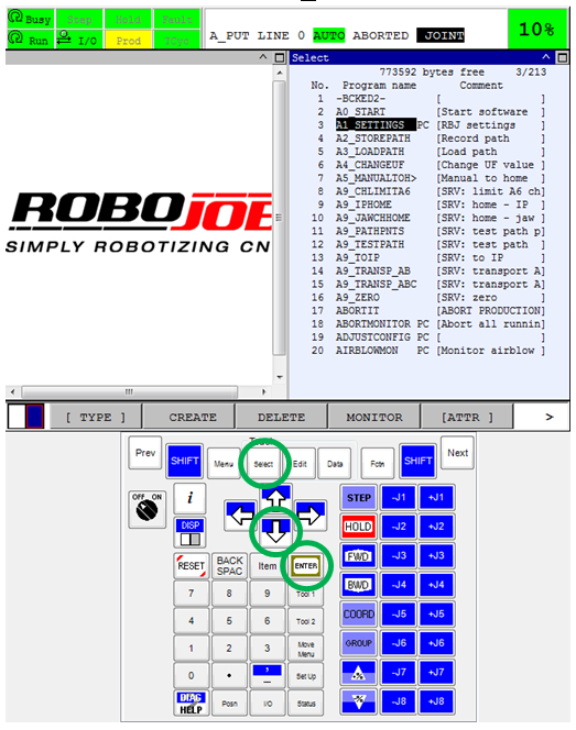
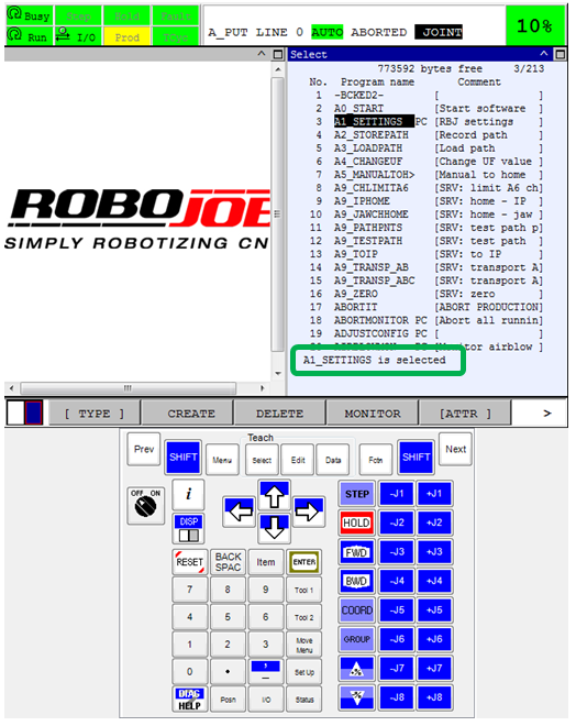
Press SELECT to open a list of all the programs on the robot. Press the arrow down and go to A1_SETTIGS. Press ENTER to select A1_SETTINGS.The message “A1_SETTINGS is selected” appears.
| A2_Settings |
If 'A1_settings' is not present, use 'A2_settings' instead.
| |
|
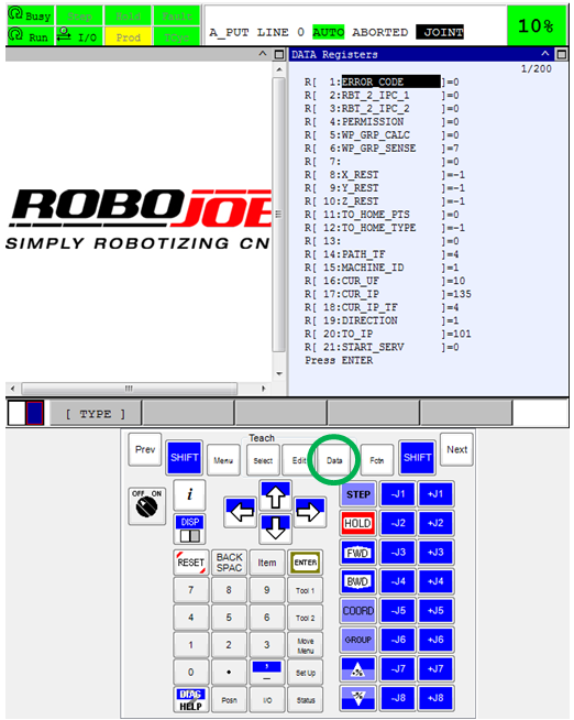
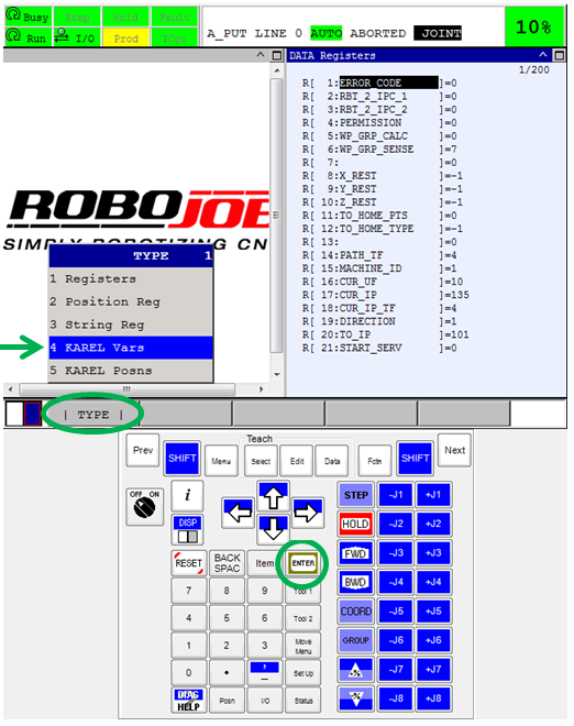
Press Data, the DATA registers are shown. Press F1 [TYPE] and select 4 KAREL Vars and press ENTER to show the karel variables of A1_SETTINGS.
| |
|
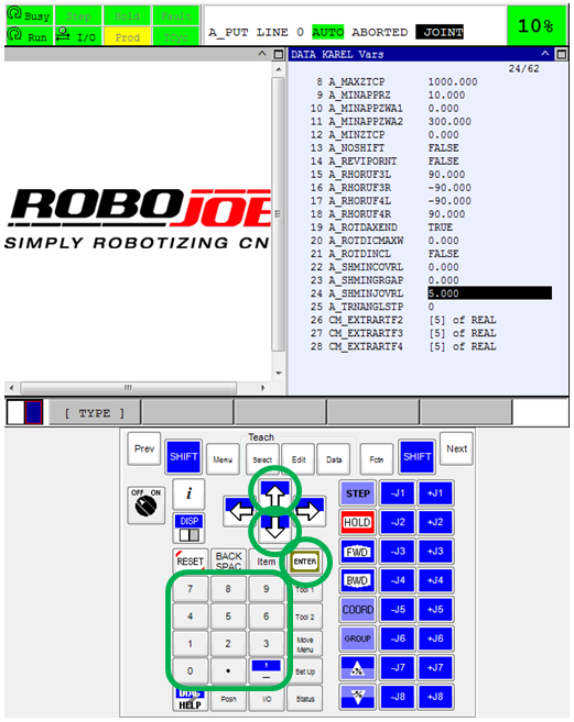
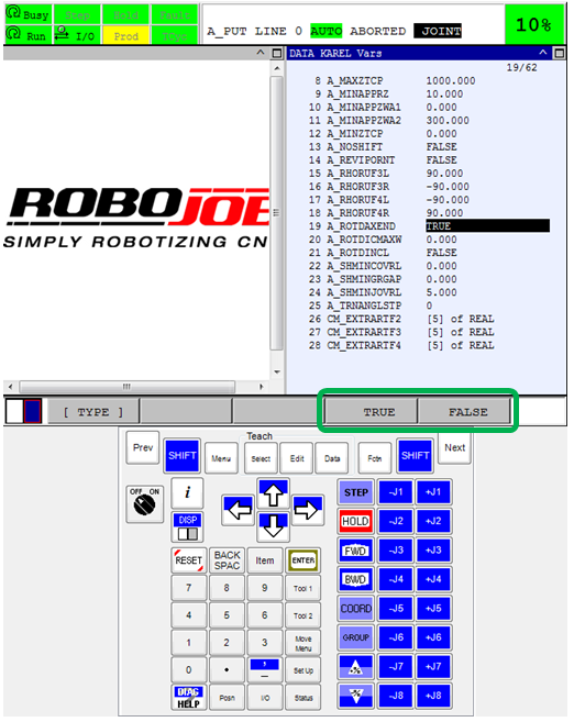
Search for the setting name that RoboJob has send, using ARROW UP and ARROW DOWN. Enter the value that RoboJob has send and press ENTER to save the value. Make sure that no other settings are changed!
| |
|
Restart the robot by cycling the power on the controller.
| After this procedure, it’s best to take a new backup of the robot! |
3. How to get further help
Do not hesitate to contact us when you need additional support beyond the documents provided in the RoboJob Service Knowledge Base.
You may contact the RoboJob Service department using following means:
-
Help Center: service.robojob.eu
-
Email: service@robojob.eu
-
Phone: +32 15 70 89 70
We kindly ask you to provide us the following information:
-
Serial number xx-xx-xxx
-
Description of the fault or defective part
-
Exact error code or message
-
What did the robot do
-
What was the robot supposed to do
-
Pictures or videos
You can send this information to us via email.To send large files you may make use of a file transfer service like WeTransfer: robojob.wetransfer.com.
An automatic confirmation will be sent upon receipt of your mail.
